
Wet vs Dry Sanding: Which is Right for Your Project?
Sanding is a fundamental step in so many projects, from woodworking to auto body repair. But when should you sand dry, and when should you reach for the water?
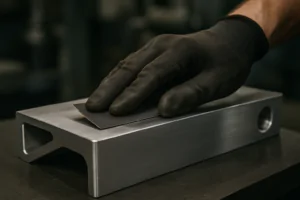
Wet sanding and dry sanding are two different techniques used to smooth surfaces, and each has its own advantages and disadvantages. The best method depends on the material you are working with, the desired finish, and the stage of the sanding process.

Comparing wet and dry sanding techniques.
Understanding the difference between wet and dry sanding is key to getting a perfect finish on your project. Using the wrong method can create more problems than it solves. Let’s explore these techniques in more detail.
What are the Disadvantages of Wet Sanding?
Wet sanding offers a lot of benefits, but it’s not always the easiest or most convenient option. There are some drawbacks you should know about before you start.
One of the main disadvantages of wet sanding is the mess it creates. The water mixes with the sanding dust to form a slurry, which can be difficult to contain and clean up. It also requires specialized waterproof sandpaper.

The mess created by wet sanding.
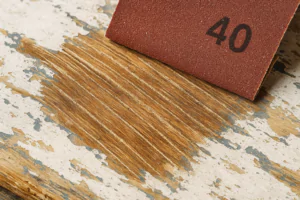
Beyond the cleanup, wet sanding can also be more time-consuming. You need to constantly reapply water, and the surface needs to dry completely before you can inspect your work or move on to the next step, like painting. The water can also hide imperfections as you sand, making it harder to see if you’ve achieved a truly flat surface until it dries. This can lead to rework. Another disadvantage is that wet sanding isn’t suitable for all materials. Wood, for example, can swell and become damaged when exposed to excessive water. You also need special waterproof sandpaper or sanding discs, like those designed by NOVOGRIT for wet applications. Using regular sandpaper with water will cause it to break down quickly. The tools you use also need to be waterproof, which limits the use of electric sanders unless they are specifically designed for wet use. Wet sanding can also introduce the risk of rust if you are working on metal and don’t dry it properly afterwards. Finally, the slurry created can clog drains or contaminate water sources if not disposed of responsibly. It requires careful handling and disposal to be environmentally friendly.
What is the Purpose of Wet Sanding?
So, if wet sanding has disadvantages, why do people use it at all? There must be some good reasons.
The primary purpose of wet sanding is to achieve a finer, smoother finish than is typically possible with dry sanding. The water helps to lubricate the surface, reduce friction, and flush away sanding debris, which prevents scratching and clogging.

Wet sanding creates a smooth surface.
Wet sanding is commonly used in automotive painting and finishing to prepare surfaces for polishing. It helps to level clear coat imperfections like orange peel and dust nibs. The water carries away the tiny particles of removed material, preventing them from getting trapped between the sandpaper and the surface. This reduces the chance of scratching the surface with these particles. This is especially important when working with very fine grits, where even a tiny piece of debris can leave a noticeable scratch. The lubrication also helps the sandpaper glide smoothly over the surface, resulting in a more even sanding pattern. Wet sanding generates less heat compared to dry sanding because the water acts as a coolant. This is important when working with heat-sensitive materials like some plastics or fresh paint, where excessive heat can cause damage or distort the surface. Wet sanding also produces significantly less airborne dust than dry sanding. This creates a healthier working environment and reduces the need for extensive dust collection systems. While it creates a mess, the mess is contained as a wet slurry rather than fine dust floating in the air. When using very fine grit sandpaper from NOVOGRIT, like 2000 grit or higher, wet sanding is almost essential to achieve the level of smoothness required for a mirror-like finish. It is the final step before compounding and polishing.
Does Wet Sanding Make it Smoother?
Yes, it does. But how and why does adding water create a smoother finish?
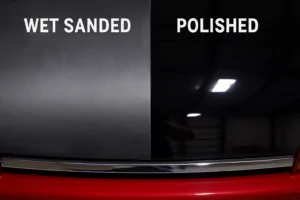
Wet sanding generally results in a smoother finish than dry sanding with the same grit sandpaper. This is because the water lubricates the surface, reduces friction, and flushes away sanding debris, minimizing scratching and allowing the abrasive particles to work more effectively.

The smoother surface created by wet sanding.
Think of dry sanding like dragging tiny rocks across a surface. As the rocks grind, they create dust. This dust can get trapped under the rocks, causing them to skip and create deeper, more erratic scratches. With wet sanding, the water acts like a lubricant and a conveyor belt. It helps the abrasive particles on the sandpaper cut more smoothly through the material. At the same time, the water washes away the material that is being removed. This prevents those particles from building up and scratching the surface you just smoothed. Because the debris is being flushed away, the sandpaper stays cleaner and sharper for longer. This means each abrasive particle is working efficiently and creating consistent scratches. When you move to finer and finer grits, this consistency is key to achieving a truly smooth surface. Imagine trying to sand something perfectly smooth with sandpaper covered in its own dust; it would just keep scratching itself. Wet sanding prevents this self-sabotage. It allows the very fine grits, like those available from NOVOGRIT, to do their job effectively, progressively reducing the scratch pattern until it is almost invisible to the naked eye, leaving a surface ready for polishing to a high shine. The reduced friction also means you generate less heat, which is important because heat can affect the way the material sands and the final surface quality.
Does Wet Sanding Increase Grit?
This is a common question, and the answer is simple: no, wet sanding itself does not increase the grit of the sandpaper.
Wet sanding does not change the actual grit size of the sandpaper. A 1500-grit sandpaper remains 1500-grit whether you use it wet or dry. However, wet sanding with a specific grit often achieves a smoother finish than dry sanding with the same grit.

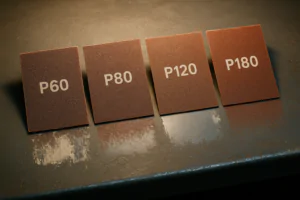
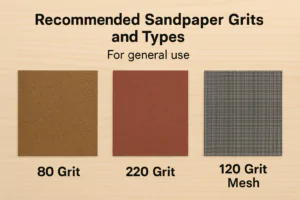
The grit number on sandpaper indicates its coarseness.
The grit number on sandpaper refers to the size of the abrasive particles embedded in the paper or cloth. A higher grit number means smaller particles, which create finer scratches and a smoother surface. This number is determined during the manufacturing process and does not change based on how you use the sandpaper. The reason wet sanding results in a smoother finish is due to the process, not a change in the abrasive itself. As we discussed earlier, the water helps the abrasive particles cut more cleanly and consistently. It prevents the buildup of debris, which in dry sanding can cause deeper, unpredictable scratches. So, while a 1500-grit sandpaper used wet will leave a much finer scratch pattern than the same 1500-grit sandpaper used dry, the grit size itself is still 1500. It’s like using a sharp knife versus a dull knife on the same material; the sharp knife will make a cleaner cut, even though it’s still the same type of knife. When you use a full range of grits from NOVOGRIT, starting with a coarser grit and progressively moving to finer grits, wet sanding at the higher grit numbers will refine the surface significantly more than if you used those same high grits dry. You are effectively achieving the potential of that grit size because the process allows the abrasive particles to work optimally.
Conclusion
Wet sanding and dry sanding are different techniques with different uses. While wet sanding can be messier, it excels at creating very smooth finishes, especially in the final stages of automotive or paint work. Dry sanding is faster for material removal and suitable for many other applications.

You may also be interested in:

What is the difference between zirconium, ceramic, and aluminum oxide abrasives?
Choosing the right abrasive can be confusing. Using the wrong one wastes time, ruins your workpiece, and costs you money. Let’s make the choice simple for you. The main difference

Best Sandpaper for Aluminum: NOVOGRIT's Guide to Flawless Finishes
What is the Best Type of Sandpaper to Use on Aluminum? Do you find yourself frustrated by sandpaper that gums up instantly when you try to smooth aluminum? It is
Best Sandpaper for Paint Removal: Grits, Types, & Tips | NOVOGRIT
What is the Best Sandpaper for Removing Paint? Are you tired of staring at chipped, peeling paint on your furniture, walls, or even your car? It's a common problem, and
Automotive Wet Sanding: Supplies, Liquids & Best Sandpaper
Automotive Wet Sanding Supplies: What Do You Really Need? Wet sanding is a crucial technique in automotive refinishing, used to achieve a flawlessly smooth surface before painting or polishing. Unlike
Best Sandpaper for Paint Removal & Grit Guide
What Is the Best Sandpaper for Removing Paint? Removing old paint can be a tedious job, but using the right sandpaper makes all the difference. It's not just about grit;
Hardwood Floor Sanding: Screen vs. Sandpaper & Best Practices
Sanding Screen vs. Sandpaper for Hardwood Floors: Which is Best? When you're tackling hardwood floor projects, choosing the right abrasive is crucial for achieving a smooth, professional finish. Both sanding
Paper Backing vs. Mesh Sanding Discs: Which Abrasive to Choose?
Paper Back vs. Mesh Sanding Discs: Which One Should You Pick? Choosing the right sanding disc backing can significantly impact your project's efficiency and finish quality. Paper-backed discs are a
Sanding Mesh vs Paper: Which is More Economical and Better?
Is Sanding Mesh More Economical Than Sandpaper? Comparing Abrasive Costs When stocking up on abrasives, cost is always a factor. Paper sandpaper has traditionally been the standard, but newer mesh
Sanding Nets & Screens Use Cases: When to Choose Mesh Abrasives
Sanding Nets and Screens: What Are Their Best Use Cases? When you encounter sanding nets or screens, you might wonder where they fit into your sanding projects. Unlike traditional solid-backed
