
How to Sand and Refinish Wood Floors?
Looking at your worn-out wood floors? They’ve lost their shine, maybe even have some scratches.
Sanding and refinishing wood floors involves preparing the area, sanding in stages with different grits, cleaning thoroughly, and applying multiple coats of finish for a renewed look.
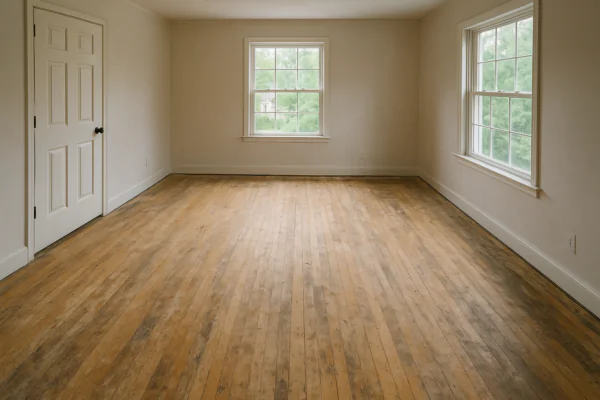
The room is ready for sanding.
Refinishing your wood floors can bring them back to life, restoring their beauty and protecting them for years to come. It’s a process that requires careful steps, from preparing the space to the final coat of finish. Understanding each stage is key to achieving a smooth, durable, and beautiful result.
Can I sand and refinish my hardwood floors myself?
Dreaming of gleaming, renewed hardwood floors but worried about the professional costs? The idea of doing it yourself seems tempting but perhaps a little daunting. You definitely can tackle this!
Absolutely, you can sand and refinish your hardwood floors yourself. It requires patience, access to the right tools, and careful, thorough preparation, but it is a very rewarding project for many homeowners who are willing to put in the effort.
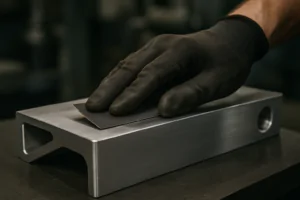
[Insert image: A homeowner, looking pleased and slightly tired, standing in a room with a beautifully self-sanded and refinished hardwood floor, tools nearby.]
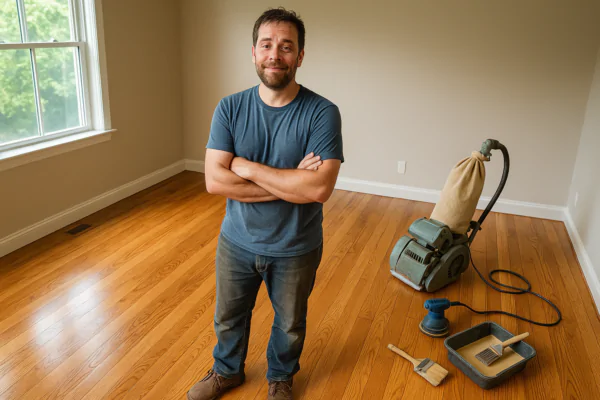
This image shows a satisfying result from DIY floor sanding.
Embarking on a DIY hardwood floor refinishing project can save you a significant amount of money. However, it’s not a task to be taken lightly. I always advise people to honestly assess their skills and the condition of their floors.
Assessing Your Project Scope
Before you even think about renting a sander, take a good look at your floors.
- Type of Wood: Softer woods like pine are more prone to damage from aggressive sanding than harder woods like oak.
- Current Finish: Is it a thin varnish or a thick polyurethane? Some old finishes might contain substances you don’t want to aerosolize without proper protection.
- Damage Level: Are there deep gouges, stains, or just surface scratches? Light wear might only need a light sanding, but significant damage will require more aggressive work. In my experience, some stains, like pet stains, can penetrate very deeply.
- Floor Area: A small room is manageable for a beginner, but tackling an entire house might be overly ambitious for a first-timer.
Key Considerations for DIY Floor Refinishing
If you decide to proceed, keep these points in mind:
- Tool Rental: Drum sanders are powerful and can remove a lot of wood quickly (and cause damage if mishandled). Orbital sanders are more forgiving for beginners but take longer. You’ll also need an edger.
- Dust Containment: This is a very dusty job. Seal off doorways with plastic sheeting and tape. Wear a good quality respirator.
- Time Commitment: Don’t underestimate the time involved. It’s usually a multi-day project, including sanding, cleaning, staining (if desired), and applying multiple coats of finish with drying time in between. We’ve seen people rush this and regret it.
- Learning Curve: Watch plenty of tutorials. Practice with the sander on a hidden area or a piece of scrap wood if possible.
When to Call a Professional
Sometimes, DIY isn’t the best route.
- If your floors are severely damaged, warped, or very old and thin.
- If you have antique or delicate inlaid floors.
- If you lack the time or physical ability for a demanding job.
- If you simply want a guaranteed professional result without the hassle.
There’s no shame in hiring a pro; sometimes it’s the wisest choice.
How to sand hardwood floors for beginners?
New to the world of floor sanding? Feeling a bit overwhelmed by all the steps and machinery involved? We can break it down to make it easy for you.
For beginners, start by preparing the room thoroughly by clearing furniture and cleaning the floor. Use a drum or orbital sander, beginning with coarse-grit sandpaper and progressively moving to finer grits to achieve a smooth, even finish.
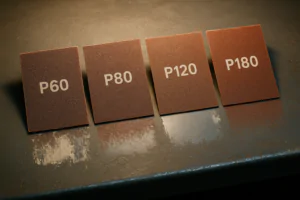
[Insert image: A simple infographic or a clear diagram showing the basic steps of floor sanding: 1. Prep Room, 2. Coarse Sand, 3. Medium Sand, 4. Fine Sand, 5. Edge Sand, 6. Clean.]
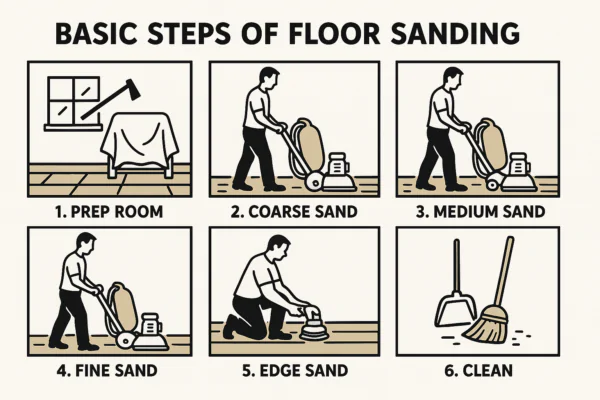
This visual guide outlines the floor sanding process.
Sanding hardwood floors might seem like a job only for professionals, but with the right approach, beginners can achieve excellent results. I’ve guided many first-timers through this, and the key is always methodical work.
Essential Tools and Materials
Before you start, gather everything you need. This preparation saves a lot of headaches later.
| Item | Purpose | Notes for Beginners |
|---|---|---|
| Drum or Orbital Sander | Main sanding of the floor surface | Orbital is more forgiving, drum is faster. |
| Edge Sander | Sands along baseboards and in corners | Essential for a complete job. |
| Various Sandpaper Grits | Coarse (36-40), Medium (60-80), Fine (100-120) | Buy more than you think you need. |
| Shop Vacuum | Cleaning up dust between sanding passes | Critical for a smooth finish. |
| Respirator/Dust Mask | Protects lungs from fine wood dust | Use a high-quality one. |
| Safety Glasses | Protects eyes | A must-have. |
| Hammer & Nail Set | To countersink any protruding nail heads | Prevents damage to sandpaper and sander. |
| Plastic Sheeting & Tape | To seal off doorways and protect fixtures | Dust control is key. |
| Wood Filler | For filling gaps or nail holes (optional) | Apply after initial sanding if needed. |
Step-by-Step Sanding Guide
Follow these steps carefully:
- Preparation: Remove all furniture, rugs, and window coverings. Seal vents and doorways with plastic. Clean the floor thoroughly. Use a nail set to countersink any nails sticking up.
- First Pass (Coarse Grit): Load the sander with coarse-grit sandpaper (e.g., 36 or 40 grit). Sand with the grain of the wood. Keep the sander moving constantly to avoid creating divots. Overlap each pass by about one-third the width of the sander. This pass removes the old finish and levels the floor.
- Second Pass (Medium Grit): After vacuuming thoroughly, switch to medium-grit sandpaper (e.g., 60 or 80 grit). Sand the entire floor again, following the same technique. This pass removes scratches left by the coarse grit.
- Final Pass (Fine Grit): Vacuum again. Now, use fine-grit sandpaper (e.g., 100 or 120 grit) for the final sanding. This creates a smooth surface ready for finishing.
- Edge Sanding: Use the edge sander with corresponding grits to sand areas the main sander couldn’t reach. Be careful, as edgers can also be aggressive.
- Clean Up: This is the most crucial step before applying finish. Vacuum meticulously. Then, wipe the floor with a tack cloth or a microfiber cloth dampened with mineral spirits (if compatible with your chosen finish) to remove all fine dust.
Tips for a Smooth Finish
- Always sand with the grain of the wood.
- Keep the sander moving; don’t let it sit in one spot while it’s on.
- Change sandpaper regularly as it becomes dull or clogged.
- Thorough vacuuming between each grit is essential. Any leftover coarse grit particles will scratch the floor during finer sanding. We tell everyone this is non-negotiable.
Can wood floors be refinished without sanding?
Do you hate the thought of all that dust and disruption that comes with sanding? Are you wishing for a simpler, less messy way to refinish your floors? There are indeed alternatives.
Yes, wood floors can sometimes be refinished without a full sanding process. Methods like screening (also known as buffing) or using chemical abrasion kits are viable, especially if the existing damage is minor and the current finish is compatible.
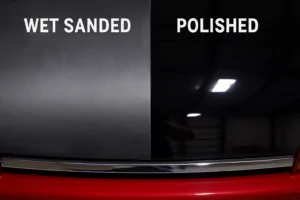
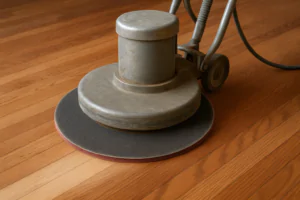
[Insert image: A floor buffing machine being gently used on a hardwood floor, showing a slight sheen improvement on the treated area.]
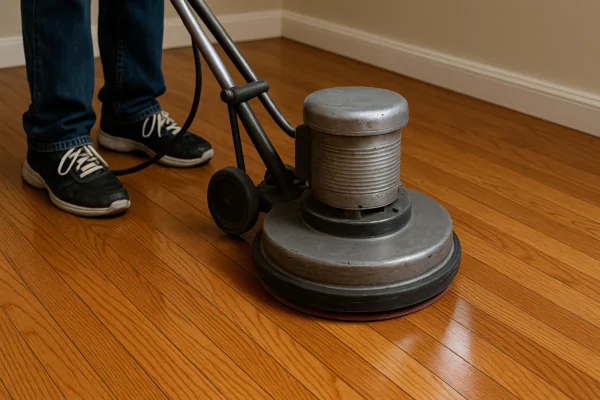
This shows a less invasive method for floor refinishing.
While full sanding is the go-to for heavily worn or damaged floors, not every floor needs such an aggressive treatment. I’ve seen many clients happy with less invasive methods when their floors were suitable.
When is No-Sand Refinishing an Option?
These techniques are generally best if:
- The existing finish is polyurethane (most modern finishes). Waxed or oiled floors typically require sanding.
- There are only light surface scratches and scuffs, not deep gouges, stains, or areas where the finish has worn through to bare wood.
- The floor is relatively level and doesn’t have significant discoloration.
- You simply want to refresh the sheen and add a new protective topcoat.
A good test I recommend is to put a few drops of water on an inconspicuous area. If the water beads up, the finish is likely intact enough for a no-sand method. If it soaks in quickly, the finish is probably too worn.
Popular No-Sand Methods
-
Screening and Recoating (Buff and Coat):
- Process: The floor is cleaned thoroughly. Then, a floor buffer (similar to a polisher but more powerful) fitted with an abrasive screen (like a large, disc-shaped piece of sandpaper, but finer) is used. This lightly abrades or "screens" the existing top layer of finish, creating a slightly rough surface for the new coat to adhere to. After vacuuming all dust, one or two new coats of compatible polyurethane are applied.
- Pros: Much less dust than full sanding, quicker, less expensive.
- Cons: Doesn’t remove deep scratches, stains, or discoloration. Won’t fix unevenness. The new finish must be compatible with the old.
-
Chemical Abrasion Kits / Liquid Refinishers:
- Process: These kits typically involve a liquid etcher or deglosser that chemically "roughs up" the old finish. The floor is cleaned, the chemical solution is applied, and after a set time, it’s either wiped off or rinsed. Then, a new coat of proprietary finish (often included in the kit) is applied.
- Pros: Often marketed as very DIY-friendly, minimal dust.
- Cons: Effectiveness can vary. May not provide as durable a bond as screening. Limited in what they can fix – strictly for floors with very minor wear. Compatibility with the existing finish is crucial. Some people I’ve spoken to have had mixed results with these kits, so research specific brands carefully.
Limitations of No-Sand Techniques
It’s important to understand that these methods are primarily for renewing the protective topcoat and improving appearance. They will not:
- Change the color of the wood (unless you use a tinted polyurethane, which can be tricky).
- Remove deep scratches, gouges, or dents.
- Fix water damage, pet stains, or areas where the wood itself is discolored.
- Level an uneven floor.
If your floors have these issues, sanding is usually the only way to properly address them.
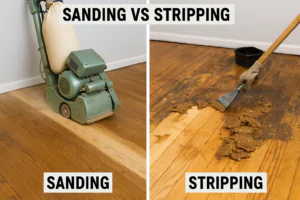
Is it better to strip or sand hardwood floors?
Is that old, stubborn finish on your hardwood floors causing you headaches? Are you unsure whether you should try to strip it away chemically or just sand it all off? We can clarify the best approach for your situation.
Sanding is generally better and more common for removing old finishes, deep scratches, and stains from most hardwood floors because it creates a uniformly fresh wood surface. Stripping is more typically used for removing paint or certain specific chemical finishes, and less often for standard polyurethane or varnish on wood.
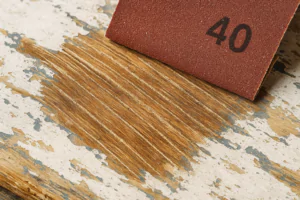
[Insert image: A split image. One side shows a section of hardwood floor being sanded with a machine, dust flying. The other side shows a gloved hand applying chemical stripper to another section of floor, with the finish starting to bubble.]

Here are two different methods for removing old floor finishes.
Choosing between stripping and sanding depends heavily on the type of finish on your floor and what you’re trying to achieve. In my experience, for most residential hardwood floors with typical varnish or polyurethane, sanding is the standard.
Understanding Stripping
Chemical strippers work by dissolving the old finish.
- What it Removes: Primarily effective on paints, some older varnishes, lacquers, and shellacs. It can sometimes work on polyurethane, but often requires very harsh chemicals and a lot of effort.
- Process:
- Apply the chemical stripper (liquid or gel) to the floor.
- Allow it to dwell and dissolve the finish (this can take minutes to hours).
- Scrape off the goopy, softened finish. This is often messy.
- Neutralize the stripper residue as per product instructions.
- Clean the floor thoroughly.
- Pros:
- Can remove multiple layers of paint without excessive dust (though fumes are a concern).
- May be preferred for intricate woodwork or areas where sanding is difficult, though less common for entire floors.
- Cons:
- Chemicals can be harsh, with strong fumes requiring excellent ventilation and protective gear (respirator, gloves, eye protection).
- Messy process involving scraping and disposal of chemical waste.
- May not remove all types of finishes evenly.
- Can sometimes damage the wood itself if not used carefully or if the wrong stripper is chosen.
- Often still requires light sanding afterwards to prepare for a new finish.
Understanding Sanding
Sanding physically abrades the old finish and a very thin layer of wood.
- What it Removes: Effective on almost all types of wood finishes (polyurethane, varnish, shellac, lacquer, paint), as well as surface scratches, minor stains, and discoloration.
- Process: (As detailed in the "How to sand hardwood floors for beginners?" section) Involves using floor sanders with progressively finer grits of sandpaper.
- Pros:
- Provides a fresh, clean, and smooth wood surface ready for any type of new finish.
- Effectively removes most imperfections.
- Can level minor unevenness in the floor.
- The standard, most reliable method for refinishing most hardwood floors.
- Cons:
- Creates a lot of fine dust (though modern sanders often have good dust collection systems).
- Requires rental of specialized equipment.
- Can be physically demanding.
- Risk of damaging the floor if done improperly (e.g., creating divots with a drum sander).
Making the Right Choice for Your Floor
| Feature | Stripping | Sanding |
|---|---|---|
| Best For | Paint, some old varnishes/lacquers | Polyurethane, varnish, most common finishes |
| Dust Creation | Low (but fumes are high) | High (manageable with good prep/equipment) |
| Effort | Messy, involves scraping, chemical handling | Physically demanding, machine operation |
| Damage Removal | Primarily finish removal | Removes finish, scratches, minor stains |
| Surface Prep | May still need light sanding | Creates ideal surface for new finish |
| Equipment | Scrapers, chemical-resistant gear | Floor sanders, edger |
| Wood Impact | Risk of chemical damage if misused | Risk of over-sanding if misused (especially thin floors) |
For most homeowners looking to refinish standard hardwood floors with a clear coat, sanding is almost always the recommended and more effective method. We usually only consider stripping in very specific circumstances, like dealing with many layers of old paint on a floor that might be too delicate or thin for aggressive sanding. If your floor has a standard polyurethane or varnish, even if it’s old and yellowed, sanding is the way to go.
Conclusion
Sandpaper is indeed simple at its core. DIY floor refinishing is achievable with careful sanding. However, no-sand or stripping methods can be options for specific situations. Always choose the best method for your floor’s condition and your skills.

You may also be interested in:

What is the difference between zirconium, ceramic, and aluminum oxide abrasives?
Choosing the right abrasive can be confusing. Using the wrong one wastes time, ruins your workpiece, and costs you money. Let’s make the choice simple for you. The main difference

Best Sandpaper for Aluminum: NOVOGRIT's Guide to Flawless Finishes
What is the Best Type of Sandpaper to Use on Aluminum? Do you find yourself frustrated by sandpaper that gums up instantly when you try to smooth aluminum? It is
Best Sandpaper for Paint Removal: Grits, Types, & Tips | NOVOGRIT
What is the Best Sandpaper for Removing Paint? Are you tired of staring at chipped, peeling paint on your furniture, walls, or even your car? It's a common problem, and
Automotive Wet Sanding: Supplies, Liquids & Best Sandpaper
Automotive Wet Sanding Supplies: What Do You Really Need? Wet sanding is a crucial technique in automotive refinishing, used to achieve a flawlessly smooth surface before painting or polishing. Unlike
Best Sandpaper for Paint Removal & Grit Guide
What Is the Best Sandpaper for Removing Paint? Removing old paint can be a tedious job, but using the right sandpaper makes all the difference. It's not just about grit;
Hardwood Floor Sanding: Screen vs. Sandpaper & Best Practices
Sanding Screen vs. Sandpaper for Hardwood Floors: Which is Best? When you're tackling hardwood floor projects, choosing the right abrasive is crucial for achieving a smooth, professional finish. Both sanding
Paper Backing vs. Mesh Sanding Discs: Which Abrasive to Choose?
Paper Back vs. Mesh Sanding Discs: Which One Should You Pick? Choosing the right sanding disc backing can significantly impact your project's efficiency and finish quality. Paper-backed discs are a
Sanding Mesh vs Paper: Which is More Economical and Better?
Is Sanding Mesh More Economical Than Sandpaper? Comparing Abrasive Costs When stocking up on abrasives, cost is always a factor. Paper sandpaper has traditionally been the standard, but newer mesh
Sanding Nets & Screens Use Cases: When to Choose Mesh Abrasives
Sanding Nets and Screens: What Are Their Best Use Cases? When you encounter sanding nets or screens, you might wonder where they fit into your sanding projects. Unlike traditional solid-backed
