
Maintenance Tips for Buffed Stainless Steel: Keep That Shine
Buffed stainless steel looks amazing. It has a beautiful, sleek finish that adds a touch of class to appliances, fixtures, and decorative items. But keeping that polished surface looking its best requires knowing how to clean and maintain it properly.
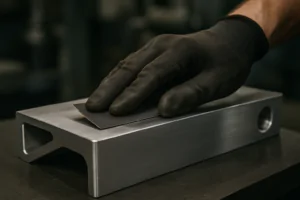
Maintaining buffed stainless steel involves regular cleaning with mild products and soft cloths, avoiding abrasive cleaners and tools that can scratch the surface. Promptly wiping up spills and polishing in the direction of the grain are key steps to preserving its shine and preventing water spots or fingerprints from becoming permanent blemishes.

Maintaining the shine by polishing along the grain.
A little effort in maintenance goes a long way in protecting your investment and ensuring your buffed stainless steel surfaces retain their elegant appearance over time.
How do you clean stainless steel after polishing?
Once you’ve achieved that beautiful buffed finish on stainless steel, what’s the best way to clean it without damaging the shine?
After polishing stainless steel, clean it using a mild soap or a specialized stainless steel cleaner and a soft micro fiber cloth. Always wipe in the direction of the metal’s grain. Rinse with clean water and immediately dry the surface thoroughly with another clean, soft cloth to prevent water spots.

Cleaning stainless steel with appropriate products and technique.
Cleaning buffed stainless steel is less about aggressive scrubbing and more about gentle, consistent care. The key is to lift dirt and grime without introducing scratches or leaving behind residues. Start by identifying the grain of the stainless steel. It will look like faint lines running in one direction across the surface. Always clean and polish following this grain. For general cleaning, a solution of warm water and a few drops of mild dish soap works well. Dip a soft cloth into the soapy water, wring it out so it’s damp but not dripping, and gently wipe the surface following the grain. For tougher spots or fingerprints, a dedicated stainless steel cleaner is often very effective. There are many commercial cleaners available, typically in spray or wipe form. Apply the cleaner to the cloth, not directly to the surface, to avoid streaks. After cleaning, it is crucial to rinse the surface with clean water using a damp cloth to remove all soap or cleaner residue. Then, immediately dry and buff the surface with a dry, soft micro fiber cloth, again following the grain. This drying step is vital because minerals in water can leave behind unsightly water spots, especially on a highly polished surface. Using a product designed specifically for stainless steel can also leave a protective layer that resists fingerprints and makes future cleaning easier.
What is the best buffing compound for stainless steel?
When you need to restore or achieve that buffed finish on stainless steel, what kind of compound should you use?
The best buffing compound for stainless steel is typically a cutting or coloring compound formulated specifically for harder metals. White or green compounds are common choices; white is a general-purpose compound for initial cutting and polishing, while green chromium oxide compound is excellent for achieving a high final polish or mirror finish on stainless steel.

Common buffing compounds for stainless steel.
Choosing the right buffing compound depends on the desired result. If you are starting with a scratched or dull surface and need to do some initial cutting to level the surface imperfections, a more aggressive cutting compound is needed. Compounds are often graded by color, and while there’s no universal standard, white compounds are generally a good starting point for polishing stainless steel after initial sanding steps. White compound contains fine abrasives that remove light scratches and prepare the surface for finer polishing. If the stainless steel is already relatively smooth and you want to achieve a brilliant, mirror-like shine, a finer "coloring" or polishing compound is necessary. Green chromium oxide compound is widely regarded as one of the best for achieving a high polish on stainless steel. It contains very fine abrasive particles that polish the surface to a bright luster. Sometimes, a two-step process is required: start with a white compound on a suitable buffing wheel (like a sisal or spiral sewn cotton wheel) to remove minor imperfections, then switch to a green compound on a softer buffing wheel (like a loose cotton or felt wheel) for the final polish. Always use a compound specifically labeled for use on metals, and ideally for stainless steel, to ensure compatibility and effectiveness. When preparing stainless steel surfaces before polishing, using high-quality abrasives like NOVOGRIT film discs can help achieve the necessary smooth foundation for the buffing compound to work effectively.
How do you care and maintain stainless steel?
Beyond just cleaning, what are the comprehensive steps for caring for and maintaining stainless steel surfaces to ensure their longevity and appearance?
Proper care and maintenance of stainless steel involve regular cleaning with appropriate products, avoiding harsh chemicals and abrasive tools, addressing spills promptly, polishing in the direction of the grain, and potentially using a stainless steel polish or protectant for added shine and fingerprint resistance.

Products used for maintaining stainless steel.
Consistent care is more effective than occasional intensive cleaning. The first rule is to avoid anything that can scratch the surface. This means no steel wool, abrasive pads (like green scrubbies), or harsh powders. Also, avoid cleaners containing chlorine bleach, as chlorine can damage the passive layer on stainless steel, leading to corrosion and pitting. Strong acids or碱s should also be avoided. For daily cleaning, a quick wipe with a damp cloth followed by drying is often sufficient. For fingerprints and smudges, or if food spills occur, use a mild soap and water or a dedicated stainless steel cleaner, always wiping along the grain. Rinse thoroughly and dry completely. Promptly wiping up spills, especially acidic ones like fruit juice or vinegar, is important to prevent etching or staining. For extra shine and to reduce the visibility of fingerprints, some people use a small amount of mineral oil or olive oil applied to a cloth and buffed into the surface, following the grain. This leaves a thin protective layer. There are also commercial stainless steel polishes and protectants available that work similarly. These products can help repel water, resist fingerprints, and leave a streak-free shine. Regular maintenance, even simple wiping and drying after use, is the best defense against water spots, stains, and dullness. For surfaces that were previously worked with abrasives, ensuring the initial finish achieved with products like NOVOGRIT high-quality sanding discs is smooth is the first step to easy ongoing maintenance.
How to get a smooth finish on stainless steel?
Achieving a smooth finish on stainless steel, whether preparing for buffing or as a final texture, requires a systematic approach with abrasives. What is the typical process?
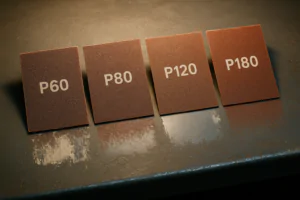
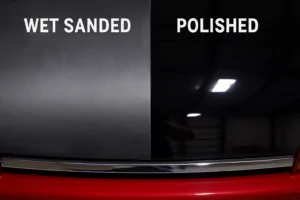
Getting a smooth finish on stainless steel usually involves a process of progressive sanding, starting with a coarser grit abrasive to remove imperfections and gradually moving to finer and finer grits until the desired level of smoothness is achieved. This is followed by polishing or buffing if a high-gloss or mirror finish is desired.

Sanding stainless steel with different grit abrasives.
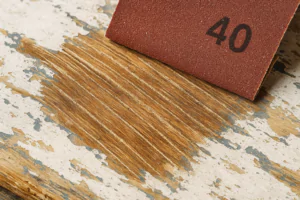
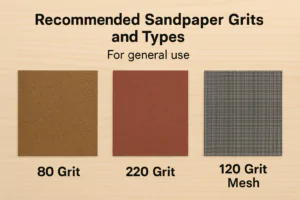
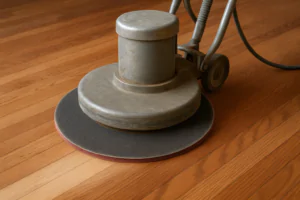
Creating a smooth finish on stainless steel is a process of removing material in a controlled manner to eliminate scratches, pits, or other surface irregularities. You start with an abrasive grit coarse enough to effectively remove the existing imperfections. For example, if the surface has deep scratches or is heavily oxidized, you might start with a grit like 80 or 120. You sand the entire surface evenly with this grit, ensuring you remove all evidence of the previous, coarser finish. Then, you move to the next finer grit (e.g., 180 or 220) and sand again, but often changing the direction of your sanding by 90 degrees relative to the previous grit. This helps ensure that the scratches left by the previous grit are completely removed. You continue this process, progressively using finer grits – common sequences might be 80, 120, 180, 240, 320, 400, 600, and even higher, depending on how smooth you want the final finish to be. Each successive grit refines the surface and removes the sanding marks left by the coarser grit before it. It is crucial to thoroughly sand with each grit before moving to the next. If you skip grits or don’t completely remove the previous scratches, they will likely remain visible in the final finish. For achieving smooth finishes efficiently, using high-quality abrasive discs designed for metal, such as NOVOGRIT sanding discs with durable film backings, is essential as they cut consistently and resist loading. After reaching the desired level of smoothness with abrasives, the surface can be left with a satin or brushed finish, or it can be taken to a high-gloss or mirror finish through buffing with compounds and soft wheels.
Conclusion
Maintaining buffed stainless steel involves consistent cleaning and care to keep it looking its best. Use mild cleaners, avoid abrasives, always wipe with the grain, and dry thoroughly. Achieving the buffed finish itself requires progressive sanding with quality abrasives followed by the right buffing compounds.

You may also be interested in:

What is the difference between zirconium, ceramic, and aluminum oxide abrasives?
Choosing the right abrasive can be confusing. Using the wrong one wastes time, ruins your workpiece, and costs you money. Let’s make the choice simple for you. The main difference

Best Sandpaper for Aluminum: NOVOGRIT's Guide to Flawless Finishes
What is the Best Type of Sandpaper to Use on Aluminum? Do you find yourself frustrated by sandpaper that gums up instantly when you try to smooth aluminum? It is
Best Sandpaper for Paint Removal: Grits, Types, & Tips | NOVOGRIT
What is the Best Sandpaper for Removing Paint? Are you tired of staring at chipped, peeling paint on your furniture, walls, or even your car? It's a common problem, and
Automotive Wet Sanding: Supplies, Liquids & Best Sandpaper
Automotive Wet Sanding Supplies: What Do You Really Need? Wet sanding is a crucial technique in automotive refinishing, used to achieve a flawlessly smooth surface before painting or polishing. Unlike
Best Sandpaper for Paint Removal & Grit Guide
What Is the Best Sandpaper for Removing Paint? Removing old paint can be a tedious job, but using the right sandpaper makes all the difference. It's not just about grit;
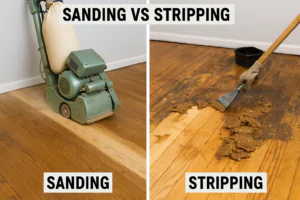
Hardwood Floor Sanding: Screen vs. Sandpaper & Best Practices
Sanding Screen vs. Sandpaper for Hardwood Floors: Which is Best? When you're tackling hardwood floor projects, choosing the right abrasive is crucial for achieving a smooth, professional finish. Both sanding
Paper Backing vs. Mesh Sanding Discs: Which Abrasive to Choose?
Paper Back vs. Mesh Sanding Discs: Which One Should You Pick? Choosing the right sanding disc backing can significantly impact your project's efficiency and finish quality. Paper-backed discs are a
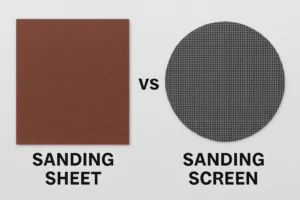
Sanding Mesh vs Paper: Which is More Economical and Better?
Is Sanding Mesh More Economical Than Sandpaper? Comparing Abrasive Costs When stocking up on abrasives, cost is always a factor. Paper sandpaper has traditionally been the standard, but newer mesh
Sanding Nets & Screens Use Cases: When to Choose Mesh Abrasives
Sanding Nets and Screens: What Are Their Best Use Cases? When you encounter sanding nets or screens, you might wonder where they fit into your sanding projects. Unlike traditional solid-backed
