
How Do You Properly Clean Wood After Sanding Before Painting?
Dusty, rough wood surfaces after sanding can ruin your paint job. You’ve put in the effort to sand, but now fine particles threaten your perfect finish. What’s the next critical step?
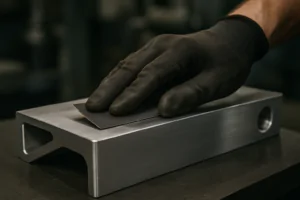
To properly clean wood after sanding and before painting, thoroughly remove all dust particles using a vacuum with a brush attachment, followed by a tack cloth or a slightly damp rag (water or mineral spirits, depending on your paint type) to ensure a perfectly clean surface for optimal paint adhesion.
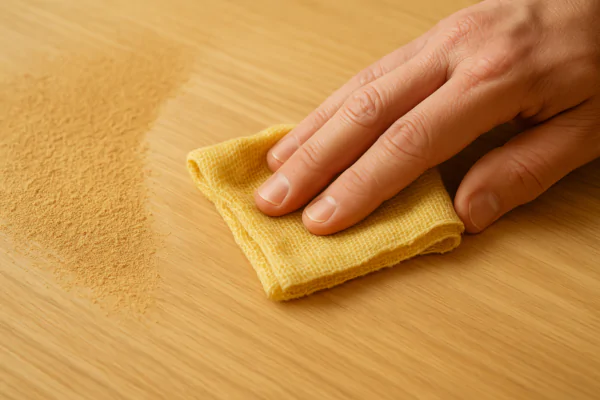
Removing fine dust is key for a smooth paint finish.
Getting this step right is the difference between a professional-looking paint job and one that looks amateurish and doesn’t last. I’ve learned this the hard way over years of woodworking and painting projects. Skipping a thorough clean can lead to all sorts of problems down the line. Let’s explore why it’s so important and the best ways to do it.
Should I Clean Wood After Sanding Before Painting?
You’ve just finished sanding, and the wood looks smooth. Is taking an extra step to clean it really necessary, or can you just start painting? You might be tempted to skip it.
Yes, absolutely. Cleaning wood after sanding is crucial because leftover dust particles prevent proper paint adhesion. This can lead to peeling, bubbling, and a rough, unprofessional finish. It’s a non-negotiable step for a quality outcome.
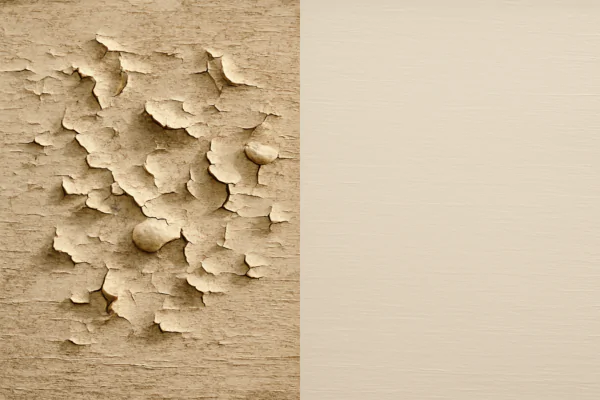
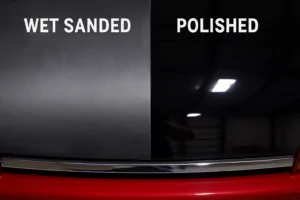
The difference is clear: clean wood ensures better paint adhesion.
I can’t stress this enough: skipping the cleaning step is a recipe for disappointment. Think of those fine dust particles as tiny barriers between your wood and your paint. The paint will stick to the dust, not to the wood itself. When I first started painting furniture, I once rushed a project and didn’t clean thoroughly after sanding. The paint looked okay initially, but within a few months, it started to flake in places. It was a frustrating lesson in why this step is so vital.
Why is Post-Sanding Cleaning So Important?
Let’s break down the specific reasons why you must clean wood after sanding:
- Paint Adhesion: This is the biggest one. Paint needs a clean, stable surface to bond to. Dust creates a loose layer that prevents the paint from gripping the wood properly. Imagine trying to stick tape to a dusty surface – it just won’t hold well.
- Smoothness of Finish: Any dust left on the surface will get trapped in the paint, creating a gritty, uneven texture. You’ve spent time sanding to get it smooth; don’t ruin it now by painting over dust. The imperfections will be very noticeable, especially with glossier paints.
- Durability and Longevity: A paint job on a clean surface will last much longer. When paint adheres well, it’s more resistant to chipping, scratching, and general wear and tear. If it’s just sitting on top of dust, it’s vulnerable.
- Appearance: Ultimately, a clean surface results in a more professional, aesthetically pleasing finish. The color will look richer, and the surface will be uniformly smooth.
Taking just a few extra minutes to clean properly will save you hours of potential rework and ensure your project looks its best for years to come.
How to Clean Sanding Dust Before Painting?
Knowing you need to clean is one thing, but how do you actually do it effectively? There are several methods, and choosing the right one ensures all dust is gone.
The most effective way to clean sanding dust involves a multi-step process: first, vacuum the surface thoroughly with a brush attachment. Then, wipe with a tack cloth or a slightly damp rag (water for latex paint, mineral spirits for oil-based) to pick up remaining fine particles.
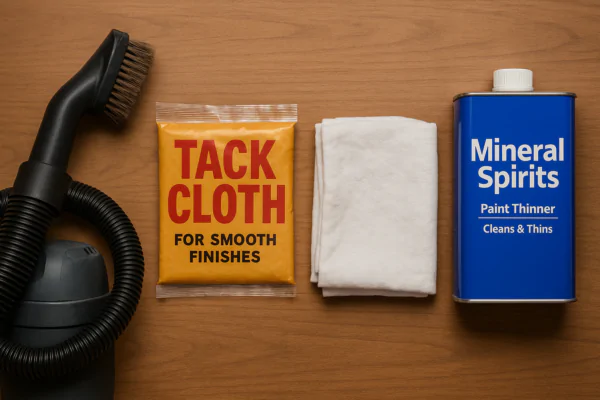
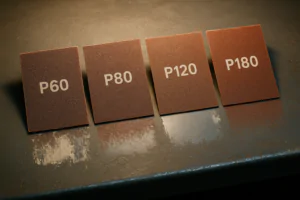
Using the right tools ensures a completely dust-free surface.
Over the years, I’ve developed a go-to routine for cleaning sanding dust. It’s not just about one tool, but often a combination. Each method has its strengths for different situations and levels of dust. The goal is to remove every last speck before that first coat of primer or paint touches the wood.
Effective Dust Removal Techniques
Here’s a breakdown of the common methods and how to use them:
-
Vacuuming:
- Tool: Use a shop vacuum or a regular vacuum with a hose and a soft brush attachment. The brush helps dislodge dust from the wood grain.
- Process: Go over the entire surface slowly and methodically. Pay extra attention to corners, crevices, and any intricate details. I find it helps to vacuum in one direction, then again in a perpendicular direction.
- Why it’s good: Removes the bulk of the dust quickly and efficiently.
-
Tack Cloth:
- Tool: A sticky, cheesecloth-like material designed to pick up fine dust.
- Process: Gently wipe the surface after vacuuming. Unfold the tack cloth and refold it frequently to expose a clean, sticky section. Don’t press too hard, or you might leave a sticky residue.
- Why it’s good: Excellent for picking up the finest particles that vacuums might miss. I always use one as my final wipe-down.
-
Damp Rag Wiping:
- Tool: A clean, lint-free rag.
- For Water-Based Paints: Slightly dampen the rag with clean water. Wring it out thoroughly; it should be just damp, not wet.
- For Oil-Based Paints: Slightly dampen the rag with mineral spirits or paint thinner. Again, ensure it’s not overly wet.
- Process: Wipe the surface gently. This method can also help to slightly "pop" the grain if using water, which can be good to lightly sand again before priming.
- Caution: Ensure the wood is completely dry before painting, especially if using water.
-
Compressed Air (Use with Caution):
- Tool: Air compressor with a nozzle.
- Process: Blow dust off the surface. Best done outdoors or in a well-ventilated area with dust extraction, as it just moves dust around.
- Why it’s sometimes used: Quick for complex shapes, but it doesn’t remove dust from the workshop, just the workpiece. I only use this as a preliminary step before vacuuming if there’s a lot of dust in crevices.
I typically vacuum first, then follow up with a tack cloth. If the wood is particularly grimy or if I’m using oil-based paint, I might opt for a mineral spirits wipe-down before the tack cloth.
What is the Best Cleaner for Wood Before Painting?
Beyond just dust, sometimes wood needs a bit more cleaning. What if there’s grease, grime, or old residue? What’s the best general cleaner to prep wood for paint?
The best cleaner depends on the wood’s condition and the type of paint you’ll use. For general dust, a tack cloth or damp rag is sufficient. For greasy or grimy wood, Trisodium Phosphate (TSP) or mineral spirits are excellent choices before final dust removal.

Choosing the right cleaner depends on the wood’s condition.
When I’m dealing with an old piece of furniture or kitchen cabinets, just removing sanding dust isn’t enough. These surfaces can have years of built-up grease, oils from hands, or residues from old polishes. Painting over this kind of contamination is asking for trouble, as the paint simply won’t stick properly or may discolor.
Choosing Your Wood Cleaner Wisely
Here’s a guide to common cleaners and when to use them:
-
Water (with a drop of mild detergent if needed):
- Use For: Lightly soiled wood, general cleaning before water-based paints. Good for removing water-soluble contaminants.
- Application: Damp (not wet) lint-free cloth.
- Considerations: Allow wood to dry completely. Can raise the grain, which might require a very light final sanding with fine-grit paper.
-
Mineral Spirits (Paint Thinner):
- Use For: Removing oily or waxy residues, cleaning before oil-based paints, or if you suspect silicone polish contamination.
- Application: Dampen a lint-free cloth. Wipe down the surface and allow it to evaporate completely.
- Considerations: Work in a well-ventilated area. Always test on an inconspicuous spot first.
-
Trisodium Phosphate (TSP) or TSP Substitute:
- Use For: Heavy-duty cleaning of grease, grime, smoke residue, and old, stubborn dirt. Excellent for prepping kitchen cabinets or heavily used furniture.
- Application: Mix according to package directions. Wear gloves and eye protection. Apply with a sponge or rag, scrub if needed, then rinse thoroughly with clean water and allow to dry completely.
- Considerations: TSP is a strong cleaner. Rinsing is crucial. It can dull existing finishes, which is fine if you’re painting over it.
-
Denatured Alcohol:
- Use For: Quick cleaning of some types_of stains, light oils, or when a fast-drying cleaner is needed. It can also help identify silicone contamination (it will fisheye).
- Application: Apply with a lint-free cloth. Evaporates quickly.
- Considerations: Flammable. Use in a well-ventilated area.
After using any liquid cleaner, always ensure the wood is bone dry before proceeding with priming or painting. My rule of thumb is: if it’s just sanding dust on new or already clean wood, a vacuum and tack cloth are perfect. If there’s any hint of grease or unknown residue, I’ll use mineral spirits or TSP first, then do a final dust removal.
How Do You Finish Wood After Sanding?
You’ve meticulously sanded and thoroughly cleaned the wood. It’s dust-free and smooth. What are the final steps before that first coat of paint to ensure a perfect finish?
After sanding and cleaning, inspect the wood one last time for imperfections. Ensure it’s completely dry. Then, apply a suitable primer. Priming seals the wood, ensures better paint adhesion, uniform color, and can block stains, leading to a professional, durable finish.
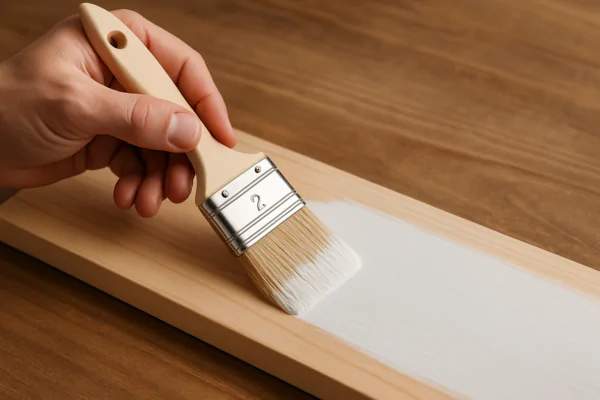
Priming is the crucial next step after cleaning for a great paint job.
This final preparation phase is where all your hard work in sanding and cleaning really pays off. Don’t rush this! I treat this stage with as much care as the sanding itself. A good primer coat is the foundation for a beautiful and long-lasting paint job.
Final Steps Before Painting
Here’s what I do after the wood is clean and dry, just before I pick up the paintbrush for the color coat:
-
Final Inspection:
- Visual Check: Look at the wood surface under good lighting, ideally at an angle. This helps reveal any missed spots, remaining dust, or minor imperfections from sanding.
- Touch Test: Run your hand (you can put it in a thin plastic bag to avoid transferring oils) over the surface. It should feel uniformly smooth.
- Grain Raising (if water was used): If you cleaned with water, the wood grain might have lifted slightly, making it feel a little fuzzy. If so, a very light pass with fine-grit sandpaper (220-grit or higher) followed by another quick clean with a tack cloth is necessary.
-
Ensure Complete Dryness:
- This is critical. Any moisture trapped under the primer or paint can cause blistering, peeling, or mold growth. If you used water or any liquid cleaner, give the wood ample time to dry thoroughly. This might be a few hours or even overnight, depending on humidity and temperature.
-
Priming – The Essential Undercoat:
- Why Prime?
- Adhesion: Primer is formulated to stick to raw wood (or existing finishes) better than paint does, and it provides an ideal surface for the topcoat to adhere to.
- Sealing: Wood is porous. Primer seals these pores, preventing the paint from soaking in unevenly, which can lead to a blotchy appearance and require more coats of paint.
- Uniformity: Primer creates a consistent base color, ensuring your paint color looks true and even. This is especially important when painting light colors over dark wood or vice-versa.
- Stain Blocking: Some primers are designed to block stains from tannins in woods like cedar or redwood, or from knots, watermarks, or ink, preventing them from bleeding through your topcoat.
- Choosing a Primer: Select a primer compatible with your chosen paint (e.g., water-based primer for latex paint, oil-based primer for oil-based paint). For problem areas or specific woods, use a stain-blocking primer.
- Application: Apply the primer smoothly and evenly, following the manufacturer’s instructions regarding drying times and recoating. Usually, one coat is sufficient, but for porous woods or significant color changes, two might be better.
- Light Sanding After Priming (Optional but Recommended): Once the primer is fully dry, I often give it a very light sanding with fine-grit sandpaper (220-grit or finer) to knock down any minor nubs or imperfections. Then, clean off the sanding dust with a tack cloth. This results in an ultra-smooth base for your paint.
- Why Prime?
Once these steps are complete, your wood is perfectly prepped and ready for its beautiful new coat of paint!
Conclusion
Cleaning wood after sanding is not just a suggestion; it’s essential for a durable, smooth, and professional paint finish. Vacuum, wipe, and prime correctly, and your painting projects will look fantastic and last for years.

You may also be interested in:

What is the difference between zirconium, ceramic, and aluminum oxide abrasives?
Choosing the right abrasive can be confusing. Using the wrong one wastes time, ruins your workpiece, and costs you money. Let’s make the choice simple for you. The main difference

Best Sandpaper for Aluminum: NOVOGRIT's Guide to Flawless Finishes
What is the Best Type of Sandpaper to Use on Aluminum? Do you find yourself frustrated by sandpaper that gums up instantly when you try to smooth aluminum? It is
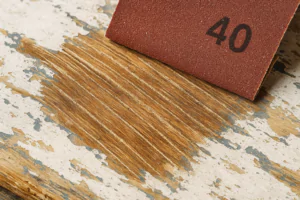
Best Sandpaper for Paint Removal: Grits, Types, & Tips | NOVOGRIT
What is the Best Sandpaper for Removing Paint? Are you tired of staring at chipped, peeling paint on your furniture, walls, or even your car? It's a common problem, and
Automotive Wet Sanding: Supplies, Liquids & Best Sandpaper
Automotive Wet Sanding Supplies: What Do You Really Need? Wet sanding is a crucial technique in automotive refinishing, used to achieve a flawlessly smooth surface before painting or polishing. Unlike
Best Sandpaper for Paint Removal & Grit Guide
What Is the Best Sandpaper for Removing Paint? Removing old paint can be a tedious job, but using the right sandpaper makes all the difference. It's not just about grit;
Hardwood Floor Sanding: Screen vs. Sandpaper & Best Practices
Sanding Screen vs. Sandpaper for Hardwood Floors: Which is Best? When you're tackling hardwood floor projects, choosing the right abrasive is crucial for achieving a smooth, professional finish. Both sanding
Paper Backing vs. Mesh Sanding Discs: Which Abrasive to Choose?
Paper Back vs. Mesh Sanding Discs: Which One Should You Pick? Choosing the right sanding disc backing can significantly impact your project's efficiency and finish quality. Paper-backed discs are a
Sanding Mesh vs Paper: Which is More Economical and Better?
Is Sanding Mesh More Economical Than Sandpaper? Comparing Abrasive Costs When stocking up on abrasives, cost is always a factor. Paper sandpaper has traditionally been the standard, but newer mesh
Sanding Nets & Screens Use Cases: When to Choose Mesh Abrasives
Sanding Nets and Screens: What Are Their Best Use Cases? When you encounter sanding nets or screens, you might wonder where they fit into your sanding projects. Unlike traditional solid-backed
