
Sanding Screen vs. Sandpaper for Hardwood Floors: Which is Best?
When you’re tackling hardwood floor projects, choosing the right abrasive is crucial for achieving a smooth, professional finish. Both sanding screens and traditional sandpaper have their place, but they serve different purposes. Understanding their distinct roles is key.
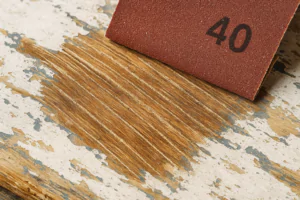
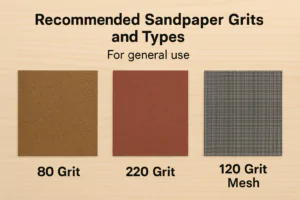
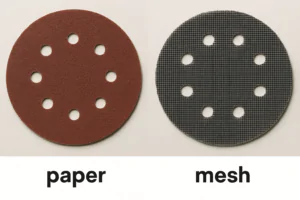
Sanding screens are primarily used for abrading or "screening" hardwood floors between coats of finish, or for light scuffing to prepare a pre-finished floor for a new topcoat. Their open mesh structure prevents clogging from old finish residue and fine dust, allowing for consistent light abrasion. Sandpaper, conversely, especially in coarser grits, is used for aggressive material removal, such as stripping old finishes, leveling uneven boards, or preparing raw wood for the first time. For the initial stages of a full floor refinishing, heavy-duty sandpaper is essential, while screens are used for intermediate and final preparation steps.

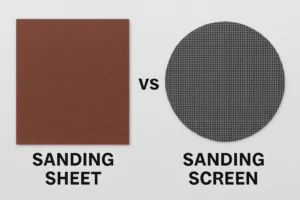
Sanding screen (left) vs. sandpaper (right).
Knowing which to use when can save you time, effort, and money on your hardwood floor project.
Are sanding screens better than sandpaper?
The question of "better" often depends on the specific task. For hardwood floors, are sanding screens truly superior, or do they simply offer a different set of advantages?
Sanding screens are not inherently "better" than sandpaper; they are specialized abrasives designed for different applications in hardwood floor refinishing. Sanding screens excel at light abrading and scuffing existing finishes without removing significant material, preventing clogging due to their open mesh structure. This makes them ideal for inter-coat abrasion or preparing a floor for re-coating. Sandpaper, especially with its more aggressive grit options and solid backing, is superior for heavy material removal, stripping old finishes, leveling boards, or aggressive sanding of raw wood. Each has specific strengths that make it effective for particular stages of the floor finishing process, meaning neither is universally better.

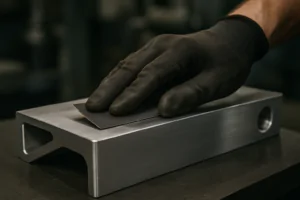
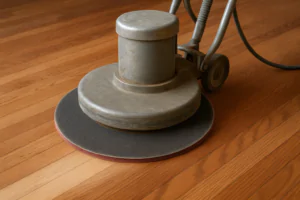
Sanding a finished floor with a screen.
From my experience, I’ve found that using the right tool for the job is always "better." For hardwood floors, this means understanding the distinct roles of sanding screens and sandpaper. When you’re trying to remove layers of old, flaky finish, a sanding screen just won’t cut it. You need the aggressive cutting power of sandpaper, often starting with a coarse grit like 36 or 60, used on a drum sander or an orbital sander. The solid backing of the sandpaper allows for consistent, heavy pressure, which is essential for leveling the floor and getting rid of deep scratches or old finish. However, once you’ve applied a coat of polyurethane and it’s dry, you’ll often get "nibs" – tiny dust particles or imperfections that settle on the wet finish. Trying to sand these out with aggressive sandpaper can easily cut too deeply or leave noticeable swirl marks. This is where a sanding screen, typically a fine grit like 120 or 150, on a buffer, becomes invaluable. The open mesh allows the tiny removed nibs and dust to pass through, preventing the screen from loading up and scratching the surface. It provides a very light, uniform scuff that helps the next coat of finish adhere perfectly. Screens are also excellent for preparing pre-finished floors for a new topcoat without having to strip them completely. So, it’s not a matter of one being "better" overall, but rather understanding that sandpaper is for the heavy lifting and initial shaping, while sanding screens are for the delicate, inter-coat abrading that ensures a glass-smooth final finish. Companies like NOVOGRIT offer both high-performance sandpaper and sanding screens specifically designed for the demanding requirements of floor refinishing.
What kind of sander is best for hardwood floors?
The type of sander you use is just as critical as the abrasive itself. Different sanders are designed for different stages of floor preparation.
For full hardwood floor refinishing, the best kind of sander is typically a combination of specialized machines: a large drum sander for aggressive material removal and leveling of the main floor area, an edge sander for reaching along walls and in corners where the drum sander cannot go, and a floor buffer (rotary sander) equipped with sanding screens or abrasive discs for intermediate smoothing, abrading between finish coats, and final preparation. For smaller repairs or detail work, a random orbital sander can also be useful.

Essential sanders for hardwood floor refinishing.
Refinishing a hardwood floor is a multi-step process, and no single sander can do it all efficiently and effectively. For the initial heavy sanding, where you’re removing old finish, deep scratches, or leveling the floor, a drum sander is usually the tool of choice. These are powerful, heavy machines that use a large abrasive belt to quickly remove material. They are designed for large, open areas. However, a drum sander cannot get right up to the baseboards or into corners. For those areas, you’ll need an edge sander. This is a smaller, round disc sander specifically designed to get close to walls and other obstructions. It’s often used with coarser grits to match the material removal of the drum sander. Finally, for the smoother intermediate sanding steps, or especially for abrading between coats of finish, a floor buffer (also known as a rotary sander) is often used. This machine rotates a large, flat abrasive disc or screen, providing a smoother, less aggressive sanding action ideal for fine-tuning the surface. For very tight spots, stair treads, or small repairs, a standard random orbital sander can also come in handy. So, for a truly professional job, it’s not one "best" sander, but a coordinated system of different machines, each serving a specific purpose in the sanding progression.
What is the best way to sand hardwood floors?
Knowing the tools is one thing, but what about the actual technique and sequence for achieving optimal results when sanding hardwood floors?
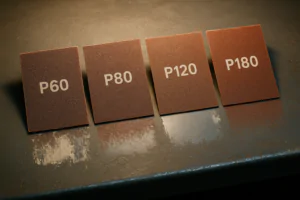
The best way to sand hardwood floors involves a systematic, multi-stage process using progressively finer grits. Begin with a coarse grit (e.g., 36-60 grit) on a drum sander, moving with the wood grain, followed by an edge sander for perimeter areas. Subsequent passes use progressively finer grits (e.g., 80-100 grit, then 120-150 grit) across the entire floor, often alternating between drum/orbital sanders and a buffer. Thorough vacuuming between each grit change is crucial to prevent coarser dust from scratching the surface. The final stages typically involve a fine sanding screen on a buffer for ultimate smoothness before the first coat of finish, or between finish coats to ensure proper adhesion and a blemish-free surface.

Step-by-step process for sanding hardwood floors.
Having sanded a few hardwood floors myself, I’ve learned that patience and attention to detail are key. You always start with the coarsest grit needed to remove the old finish or imperfections. For a heavily damaged floor, this might mean a 36-grit paper on a drum sander. You always move the sander with the grain of the wood, never across it, to avoid noticeable cross-grain scratches. Once the main floor area is done with the coarse grit, you use the edge sander with the same grit along the walls. Then, you vacuum everywhere – thoroughly. Even a tiny bit of coarse dust left behind can cause deep scratches when you move to the next finer grit. The next pass involves an 80-grit paper, again with the drum and edge sanders, removing the scratches from the previous grit. Vacuum again. You continue this progression, typically going up to 100 or 120 grit. For the final sanding pass before applying the finish, many professionals use a buffer with a fine abrasive screen (like 120 or 150 grit) or a fine grit abrasive disc (often 150-180 grit) to achieve a super smooth surface. After the first coat of finish, a light buffing with a fine screen (often 150-220 grit) will remove any "nibs" and prepare the surface for subsequent coats, ensuring excellent adhesion. This systematic approach, with meticulous cleaning between grits, is the best way to ensure a flawless, professional-looking hardwood floor.
Is it better to strip or sand hardwood floors?
The decision to strip or sand depends entirely on the condition of the floor and the desired outcome.
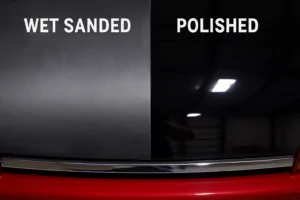
It is almost always better to sand hardwood floors rather than chemically strip them, especially for a full restoration or to change the color of the wood. Sanding effectively removes all layers of old finish, deep scratches, and stains, and also levels the floor, allowing for a fresh start and the application of new stains or finishes directly to raw wood. Chemical stripping can be messy, labor-intensive, may not fully remove all finish or penetrate stains, and can potentially damage the wood or leave residues that affect new finishes. Stripping might be considered only for very specific, small areas or delicate antique floors where sanding is not feasible, but it is not the standard or preferred method for entire floor refinishing.

Sanding is generally preferred over chemical stripping for floors.
From a practical standpoint, having seen both processes, sanding is overwhelmingly the preferred method for refinishing hardwood floors. Chemical stripping, while it might sound easier in theory, is incredibly messy and often less effective. Strippers can be caustic, requiring extensive safety precautions, and they turn the old finish into a gooey, difficult-to-remove sludge. This sludge often gets into the wood grain, and if not completely removed, it can interfere with the adhesion of new finishes or prevent stains from penetrating evenly. Plus, chemical strippers don’t remove scratches, dents, or level uneven boards; they only remove the surface coating. Sanding, on the other hand, physically removes the old finish, the top layer of damaged wood, and any shallow imperfections. It essentially gives you a brand new, clean wood surface to work with, allowing for deep cleaning, potential restaining, and a durable new finish. It also effectively levels the floor, addressing any high or low spots. While sanding creates dust (which is why good dust collection is vital, and products like NOVOGRIT’s mesh abrasives help immensely), it’s a much more controlled and ultimately more effective process for achieving a truly restored and beautiful hardwood floor. Unless you have a very specific, delicate situation (like an intricately inlaid floor you can’t risk sanding), always opt for sanding.
Conclusion
Sanding screens are for light abrasion between finish coats on hardwood floors, while sandpaper is for aggressive material removal and leveling. For floor refinishing, a combination of drum, edge, and buffer sanders is best. Always sand systematically through grits, and generally, sanding is far superior to chemical stripping for effective floor restoration.

You may also be interested in:

What is the difference between zirconium, ceramic, and aluminum oxide abrasives?
Choosing the right abrasive can be confusing. Using the wrong one wastes time, ruins your workpiece, and costs you money. Let’s make the choice simple for you. The main difference

Best Sandpaper for Aluminum: NOVOGRIT's Guide to Flawless Finishes
What is the Best Type of Sandpaper to Use on Aluminum? Do you find yourself frustrated by sandpaper that gums up instantly when you try to smooth aluminum? It is
Best Sandpaper for Paint Removal: Grits, Types, & Tips | NOVOGRIT
What is the Best Sandpaper for Removing Paint? Are you tired of staring at chipped, peeling paint on your furniture, walls, or even your car? It's a common problem, and
Automotive Wet Sanding: Supplies, Liquids & Best Sandpaper
Automotive Wet Sanding Supplies: What Do You Really Need? Wet sanding is a crucial technique in automotive refinishing, used to achieve a flawlessly smooth surface before painting or polishing. Unlike
Best Sandpaper for Paint Removal & Grit Guide
What Is the Best Sandpaper for Removing Paint? Removing old paint can be a tedious job, but using the right sandpaper makes all the difference. It's not just about grit;
Paper Backing vs. Mesh Sanding Discs: Which Abrasive to Choose?
Paper Back vs. Mesh Sanding Discs: Which One Should You Pick? Choosing the right sanding disc backing can significantly impact your project's efficiency and finish quality. Paper-backed discs are a
Sanding Mesh vs Paper: Which is More Economical and Better?
Is Sanding Mesh More Economical Than Sandpaper? Comparing Abrasive Costs When stocking up on abrasives, cost is always a factor. Paper sandpaper has traditionally been the standard, but newer mesh
Sanding Nets & Screens Use Cases: When to Choose Mesh Abrasives
Sanding Nets and Screens: What Are Their Best Use Cases? When you encounter sanding nets or screens, you might wonder where they fit into your sanding projects. Unlike traditional solid-backed
Paper vs. Mesh Sanding Discs: Which Abrasive to Choose?
Paper vs. Mesh Sanding Discs: Which Should You Buy? Choosing the right abrasive disc is essential for efficient and effective sanding. Two primary types dominate the market: traditional paper-backed discs
