
Common Mistakes When Using Sanding Belts: Avoid These Pitfalls
Using sanding belts seems straightforward, but it’s easy to make mistakes that can ruin your workpiece, wear out your belts prematurely, or even cause injury. Recognizing these common errors helps you sand more effectively and safely.
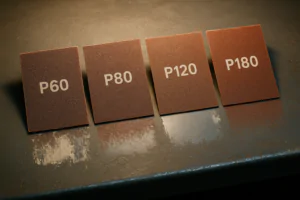
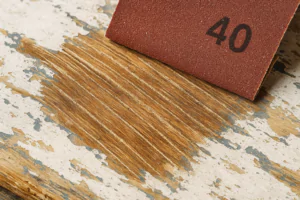
Common mistakes when using sanding belts include using the wrong grit for the task, applying excessive pressure, failing to clean clogged belts, neglecting sander maintenance (like tracking and dust collection), sanding against the wood grain, and ignoring safety precautions such as wearing eye protection and securing the workpiece.

Illustrating the mistake of sanding against the wood grain.
Avoiding these common mistakes will lead to better finishes, longer-lasting belts, and a safer work environment.
What are 3 safety rules for belt sander?
Safety is paramount when operating power tools. What are three essential safety rules specifically for using a belt sander?
Three essential safety rules for using a belt sander are: Always wear appropriate personal protective equipment (PPE), including safety glasses or a face shield and hearing protection; ensure the workpiece is securely clamped or held to prevent it from moving or being thrown; and keep hands and fingers away from the moving belt and rollers.

Following safety protocols when using a belt sander.
Working safely with power tools protects you from harm. Sanding generates a lot of fine dust, which can be harmful to your eyes and respiratory system. Always wear safety glasses or a face shield to protect your eyes from flying debris. The sander can also be loud, especially under load, so hearing protection is necessary to prevent long-term hearing damage. Belt sanders are powerful tools that can grab and throw small or unsecured workpieces. Always make sure the material you are sanding is firmly clamped or held stable on a workbench or other support. Never try to hand-hold small pieces while sanding with a portable belt sander. The moving belt and rollers can cause serious injury if your fingers or clothing get caught. Always keep your hands a safe distance away from the moving parts of the sander while it is in operation. Use push blocks or handles when possible to keep your hands away from the belt surface. Following these fundamental safety rules significantly reduces the risk of accidents when using a belt sander.
Why do I keep breaking sanding belts?
Breaking sanding belts is frustrating and costly. What are the common reasons why a sanding belt might repeatedly break?
Sanding belts can break for several reasons, including improper tension on the sander, misaligned tracking that causes the belt to rub against the sander housing, a damaged or weak splice (the joint where the belt is joined), using the wrong type of belt for the application (e.g., too light-duty for heavy grinding), or impact from the workpiece or foreign objects.

Examining a broken sanding belt, often at the splice.
Belt breakage is usually a sign of an issue with the belt itself, the sander setup, or how it’s being used. One major culprit is improper belt tension. Too much tension puts excessive strain on the belt, especially the splice, leading to premature failure. Too little tension can cause the belt to slip, which generates heat and can also weaken the belt. Make sure the tension is set correctly according to your sander’s manual. Poor belt tracking is another common cause. If the belt is consistently rubbing hard against the side of the sander housing or a guide, the edge of the belt will wear down rapidly, potentially leading to a break. Adjusting the tracking knob to keep the belt centered is essential. The splice is the weakest point on any sanding belt because it’s a joint rather than continuous material. If the splice is poorly made, damaged, or becomes worn, it’s likely to fail under tension. Inspect new belts for splice quality before use. Using a belt that is not designed for the task can also lead to breakage. For instance, using a light paper-backed belt for heavy metal grinding is likely to result in a break. Impact is another factor; if the belt catches on the edge of the workpiece or hits a foreign object embedded in the material (like a nail or staple), it can cause a sudden tear or breakage. Ensuring you use the correct type of belt for your application, maintaining your sander, and using proper technique will help prevent frustrating belt breakages. Quality belts from manufacturers like NOVOGRIT are designed with strong splices and durable backings to minimize breakage issues.
What is the proper way to use a belt sander?
Using a belt sander effectively involves more than just turning it on. What is the correct technique for using one?
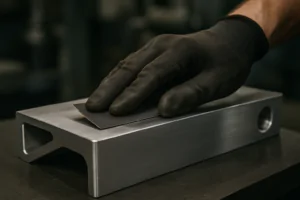
The proper way to use a belt sander involves securing the workpiece, starting the sander off the workpiece, slowly and smoothly moving the sander along the material, working with the grain direction when sanding wood, using steady, even pressure (letting the belt do the work), and keeping the sander moving to avoid creating divots or uneven spots.

Illustrating the correct technique for using a belt sander.
Using a belt sander correctly maximizes its efficiency and produces the best finish. Always start with the workpiece securely clamped. Place the sander on the workpiece with the belt slightly lifted or at the back edge, then turn the sander on. Once the belt is at full speed, gently lower it onto the workpiece. For wood, always sand with the grain. Sanding across the grain will leave deep, unsightly scratches that are difficult to remove. Move the sander smoothly and consistently along the length of the workpiece. Overlap your passes slightly to ensure even coverage. Avoid pressing down too hard; excessive pressure doesn’t make the belt cut faster, it only generates heat, clogs the belt, and risks stalling the motor or creating gouges. Let the sharp abrasive grains, especially on quality belts like those from NOVOGRIT, do the work. Keep the sander moving at all times while it’s in contact with the workpiece. Pausing in one spot, even for a second, will quickly sand a low spot or divot into the material due to the aggressive nature of belt sanders. Lift the sander off the workpiece before turning it off. Using this technique helps achieve a flat, smooth surface efficiently and prevents common sanding errors.
What are the limitations of a belt sander?
While powerful, belt sanders aren’t suitable for every sanding task. What are their primary limitations?
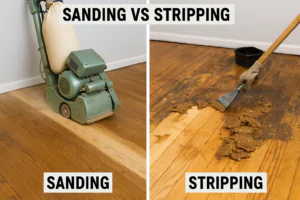
The primary limitations of a belt sander include its aggressive nature, which makes it prone to removing material quickly and potentially creating uneven surfaces or divots if not handled correctly; its size and shape, which make it unsuitable for detail work or sanding in tight corners; and the linear scratch pattern it leaves, which may require further sanding with other tools (like orbital sanders) for a finer finish on some materials.

Illustrating areas where a belt sander cannot reach.
Belt sanders are powerful tools, excellent for rapid material removal over large, flat surfaces, but they have specific limitations. Their aggression is a double-edged sword; while great for flattening warped boards or stripping finishes quickly, it also means they can easily remove too much material or create uneven spots if you’re not careful or if you pause in one place. Mastering smooth, continuous movement is key. The shape and size of most portable belt sanders make them awkward or impossible to use for detailed work, sanding inside tight corners, or working on contoured surfaces. For these tasks, smaller sanders like detail sanders, random orbital sanders, or even hand sanding are more appropriate. Belt sanders create a linear scratch pattern that runs along the direction of the belt’s movement. While this is ideal when sanding with the wood grain, for applications requiring a completely swirl-free finish, especially before staining or painting, you often need to follow up with a random orbital sander which creates a less noticeable, non-directional scratch pattern. So, while a belt sander with a quality NOVOGRIT belt is excellent for rough shaping and initial surface preparation, it’s often just one step in the overall sanding process.
Conclusion
Avoiding common belt sanding mistakes, such as improper technique or neglecting safety, ensures better results and longer-lasting belts. Understanding the reasons for belt breakage and the limitations of belt sanders helps you use this powerful tool effectively and safely for its intended purpose.

You may also be interested in:

What is the difference between zirconium, ceramic, and aluminum oxide abrasives?
Choosing the right abrasive can be confusing. Using the wrong one wastes time, ruins your workpiece, and costs you money. Let’s make the choice simple for you. The main difference

Best Sandpaper for Aluminum: NOVOGRIT's Guide to Flawless Finishes
What is the Best Type of Sandpaper to Use on Aluminum? Do you find yourself frustrated by sandpaper that gums up instantly when you try to smooth aluminum? It is
Best Sandpaper for Paint Removal: Grits, Types, & Tips | NOVOGRIT
What is the Best Sandpaper for Removing Paint? Are you tired of staring at chipped, peeling paint on your furniture, walls, or even your car? It's a common problem, and

Automotive Wet Sanding: Supplies, Liquids & Best Sandpaper
Automotive Wet Sanding Supplies: What Do You Really Need? Wet sanding is a crucial technique in automotive refinishing, used to achieve a flawlessly smooth surface before painting or polishing. Unlike
Best Sandpaper for Paint Removal & Grit Guide
What Is the Best Sandpaper for Removing Paint? Removing old paint can be a tedious job, but using the right sandpaper makes all the difference. It's not just about grit;
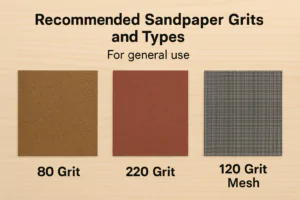
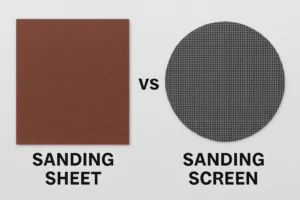
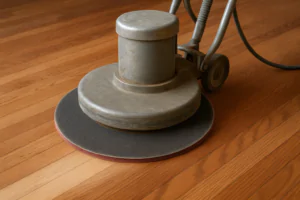
Hardwood Floor Sanding: Screen vs. Sandpaper & Best Practices
Sanding Screen vs. Sandpaper for Hardwood Floors: Which is Best? When you're tackling hardwood floor projects, choosing the right abrasive is crucial for achieving a smooth, professional finish. Both sanding
Paper Backing vs. Mesh Sanding Discs: Which Abrasive to Choose?
Paper Back vs. Mesh Sanding Discs: Which One Should You Pick? Choosing the right sanding disc backing can significantly impact your project's efficiency and finish quality. Paper-backed discs are a
Sanding Mesh vs Paper: Which is More Economical and Better?
Is Sanding Mesh More Economical Than Sandpaper? Comparing Abrasive Costs When stocking up on abrasives, cost is always a factor. Paper sandpaper has traditionally been the standard, but newer mesh
Sanding Nets & Screens Use Cases: When to Choose Mesh Abrasives
Sanding Nets and Screens: What Are Their Best Use Cases? When you encounter sanding nets or screens, you might wonder where they fit into your sanding projects. Unlike traditional solid-backed
