
Which is the Best Kind of Sandpaper to Use on Plastic?
Sanding plastic can seem daunting. Choose the wrong sandpaper or technique, and you might end up with deep scratches or even melt the surface, ruining your project. What’s the secret to a smooth, professional finish?
The best sandpaper for most plastic applications is wet/dry silicon carbide sandpaper. Its inherent sharpness and the ability to use it wet minimize clogging and heat buildup, which are critical factors when working with heat-sensitive plastic materials, ensuring a smoother result.
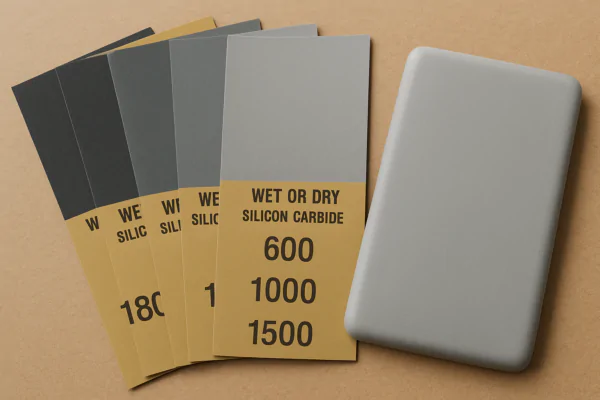
Wet/dry silicon carbide sandpaper is your go-to for smooth plastic finishes.
Understanding why this type of sandpaper excels and how to select the appropriate grit for your specific plastic project is crucial. Whether you’re prepping a 3D print, restoring an old plastic item, or working on a delicate model, the right approach to sanding will make all the difference. Let’s explore the kinds of sandpaper and techniques that work best.
What Kind of Sandpaper Do You Use on Plastic?
You’re faced with a plastic surface that needs smoothing, but which sandpaper should you reach for? Using the wrong abrasive can quickly lead to frustration, potentially melting or gouging the very material you’re trying to perfect.
For plastic, silicon carbide sandpaper, especially the "wet/dry" variety, is generally the top choice due to its sharpness. While aluminum oxide can be used for initial, rougher sanding, other types like garnet or emery cloth are often less suitable and may clog or be too aggressive.
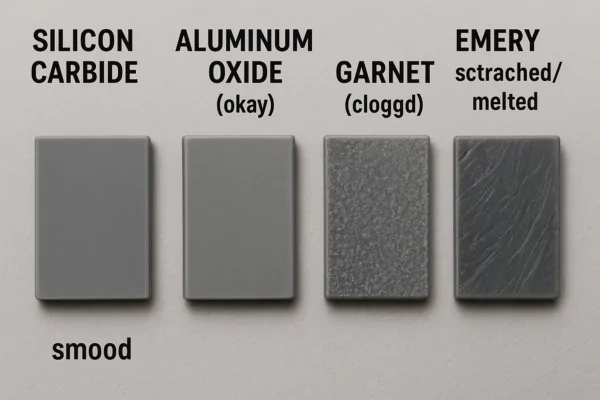
Different abrasives yield different results on plastic surfaces.
When I first started working with various plastics, I learned quickly that not all sandpapers are created equal. Some would grab and tear at softer plastics, while others would skate uselessly over harder types. Finding the right match between the abrasive material and the plastic is key.
Understanding Abrasive Materials
The material the grit is made from significantly impacts its performance on plastic:
- Silicon Carbide: This is my preferred abrasive for plastics. It’s very hard and very sharp, with friable grains that break down during use to expose new sharp edges. This makes it cut efficiently with less pressure, reducing heat. It’s the standard for wet/dry sandpaper, which is ideal for plastics.
- Aluminum Oxide: A common and durable abrasive, often found in general-purpose sandpaper. It can work on plastics, especially for more aggressive stock removal or on harder plastics. However, it can sometimes load up (clog) faster than silicon carbide or generate more heat if you’re not careful. I might use it for an initial shaping step if I have a very rough surface.
- Garnet: This is a natural abrasive that’s relatively softer. It’s excellent for woodworking because it produces a smooth finish without much scratching. However, on plastics, it tends to dull quickly and isn’t very efficient.
- Emery Cloth: Emery is a very hard mineral often bonded to a cloth backing, typically used for metal polishing and rust removal. It’s generally too aggressive for most plastics and can cause deep scratches or melting.
Wet vs. Dry Sanding Plastic
The "wet/dry" designation on silicon carbide sandpaper is important:
- Dry Sanding: This can be done with many sandpapers. It’s often quicker for initial shaping. However, with plastic, dry sanding generates dust that can clog the sandpaper and, more importantly, friction that leads to heat. Too much heat can cause the plastic to melt or smear.
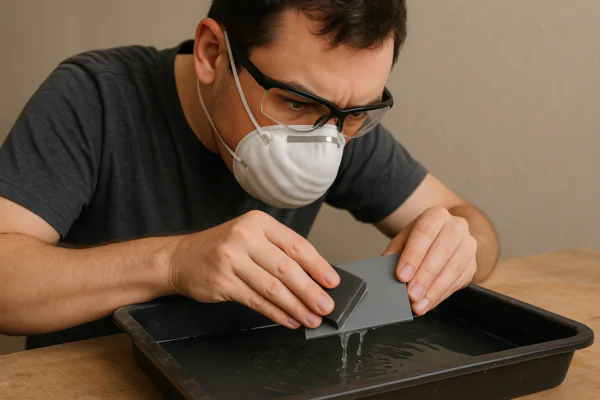
- Wet Sanding: This involves using water (sometimes with a drop of dish soap to break surface tension) as a lubricant. The water helps to float away the sanded particles, keeping the sandpaper cleaner and preventing clogging. Crucially, it also keeps the plastic surface cool, significantly reducing the risk of melting. This method almost always results in a smoother finish on plastic. I almost exclusively wet sand plastic once I get to finer grits.
The backing material of the sandpaper (e.g., waterproof paper for wet/dry, flexible film) also plays a role in how well it conforms to surfaces and its durability.
What Grit Sandpaper Won’t Scratch Plastic?
Are you worried that any sandpaper you use will leave unsightly scratches on your plastic project? It’s a valid concern, as starting with too coarse a grit is a common mistake that can create deep gouges.
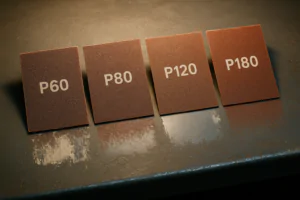
Technically, all sandpaper works by creating scratches; the goal is to make them progressively finer until they’re invisible. To avoid unwanted, deep scratches on plastic, start with finer grits (e.g., 400-600) for minor smoothing, or use a very gentle touch with medium grits (220-320) for more significant flaws, then proceed to even finer grits.
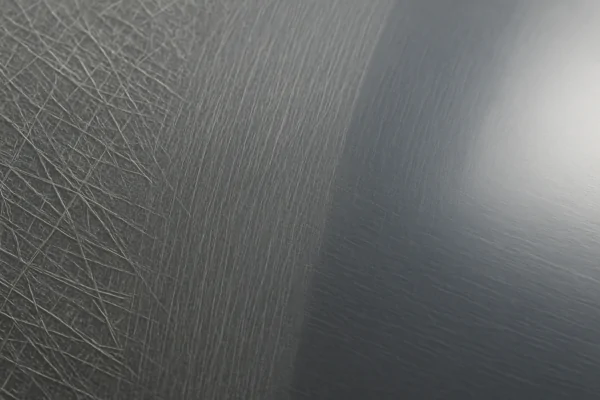
Sanding is about replacing coarse scratches with finer ones.
The term "scratch" can be misleading. When we sand, we are intentionally abrading the surface, which means creating tiny scratches. The trick is to control the size of these scratches. I always tell people to think of it as replacing big scratches with lots of tiny, unnoticeable ones.
The Concept of "Scratching" in Sanding
Sanding is essentially a process of controlled abrasion. You use a coarser grit to remove material or larger imperfections (which are, themselves, a type of scratch or flaw), and then you use successively finer grits to remove the scratches left by the previous, coarser grit. Unwanted "scratches" are those that are too deep for the current stage of your work or are erratically gouged into the surface due to improper technique or grit selection.
Starting Grit Selection for Minimal Scratching
The key to not leaving damaging scratches is to start with a grit that’s appropriate for the task and the condition of the plastic:
- For light smoothing, paint preparation, or removing minor blemishes: I usually start with 400 grit, or even 600 grit if the surface is already fairly good.
- For smoothing rougher edges, minor 3D print layer lines, or slightly uneven surfaces: You might begin with 220 grit or 320 grit. Go very gently and check your progress often.
- For significant material removal or very rough surfaces (less common when trying to avoid scratches): Grits like 100-180 can be used, but understand these will leave noticeable scratches that you’ll then need to sand out with finer grits. This is more for shaping than for finishing.
Grit Progression is Your Best Friend
The golden rule for a scratch-free (or rather, invisibly scratched) finish is grit progression:
- Don’t make huge jumps in grit numbers. A good rule of thumb I follow is not to skip more than about 100-150 points (e.g., move from 220 to 320 or 400, not directly from 220 to 1000).
- Each finer grit sandpaper is designed to remove the scratch pattern left by the previous, coarser grit.
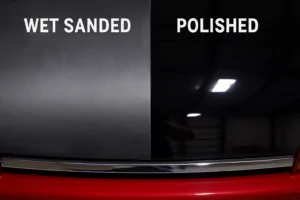
- A typical progression might look like this: 220 -> 320 -> 400 -> 600 -> 800 -> 1000 -> 1500 -> 2000 (if aiming for a polish).
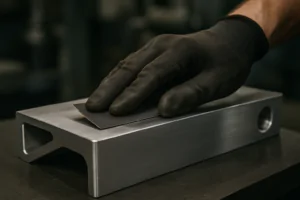
Using light pressure and letting the sandpaper do the work, especially with wet sanding, will significantly reduce the risk of deep, unintentional scratches. A sanding block for flat surfaces also helps distribute pressure evenly.
What Sandpaper to Use on Plastic Models?
Building plastic models demands a high level of precision and care. Using the wrong sandpaper on these often delicate parts can easily obliterate fine surface details or damage the model.
For plastic models, always opt for fine to ultra-fine grit wet/dry silicon carbide sandpaper, typically ranging from 400 to 2000 grit or even higher. Specialized tools like sanding sticks, flexible sanding sponges, and micro-mesh abrasives are also extremely popular among modelers for their control and ability to work on intricate shapes.
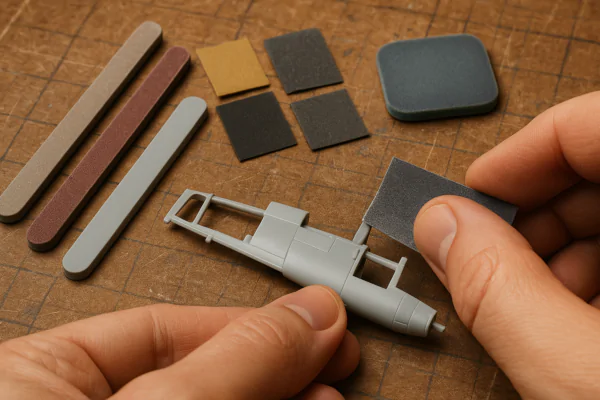
Precision tools and fine grits are essential for plastic model work.
As someone who enjoys model making, I know how crucial the sanding stage is. It’s often the difference between an amateurish build and a contest-worthy piece. The goal is usually to eliminate seam lines where parts join, remove marks left from the sprue (the plastic frame the parts come on), and prepare the surface for a flawless paint job.
Why Model Sanding Requires Special Attention
Model kits present unique challenges:
- Scale and Detail: Parts are small, and surface details (like panel lines or rivets) are fine and easily erased by overly aggressive sanding.
- Material: Model plastic (often polystyrene) is relatively soft and can be easily gouged or melted.
- Common Tasks: Filling and sanding seam lines, removing ejector pin marks, and smoothing out sprue gate remnants are common.
Recommended Grits for Plastic Models
My typical grit progression for models looks something like this:
- Initial seam line or sprue mark removal: I might start gently with 400 grit, or sometimes 600 grit if the imperfection is minor.
- General smoothing and refining: 600 grit up to 800 grit.
- Final pre-paint smoothing: 1000 grit to 1200 grit, sometimes even 1500 grit for a super smooth base.
- Polishing clear parts (canopies, windows) or for a high-gloss unpainted finish: This is where you go into ultra-fine grits, from 1500 up to 12000 using products like Micro-Mesh.
Specialized Sanding Tools for Modelers
Many modelers, myself included, rely on more than just sheets of sandpaper:
- Sanding Sticks/Twigs/Files: These are often just sandpaper of various grits glued to craft sticks, coffee stirrers, or purpose-made plastic sticks. They offer excellent control for specific areas.
- Sanding Sponges/Pads: Flexible abrasive sponges conform to curved surfaces and help distribute pressure evenly, preventing flat spots.
- Micro-Mesh Abrasive Pads: These are cushioned abrasive cloths that go to extremely fine grits (e.g., 1500 to 12000). They are fantastic for achieving a glass-smooth polish, especially on clear parts.
- Hobby Knife (for scraping): Sometimes, the back edge of a hobby knife blade is carefully used to scrape down prominent seam lines before any sanding begins.
Wet sanding is highly recommended for model work to keep dust down (which can obscure fine detail) and achieve the smoothest possible finish. A drop of dish soap in the sanding water can help reduce surface tension and improve particle removal.
Is It Safe to Sandpaper Plastic?
When you start sanding plastic, you might naturally wonder about safety. Does it release harmful dust? Could you damage the material beyond repair? These are important considerations.
Yes, it is generally safe to sandpaper plastic provided you take necessary precautions. The main concerns are inhaling microplastic dust, so wearing a dust mask is essential, and avoiding excessive heat buildup that can melt the plastic and release fumes. Wet sanding significantly mitigates both of these risks.
Proper safety gear and techniques make sanding plastic safe.
Safety should always be a priority in any workshop task, and sanding plastic is no exception. While it’s not inherently highly dangerous like working with some harsh chemicals, there are a few things I always keep in mind to protect myself and the project.
Health Precautions When Sanding Plastic
- Dust Inhalation: Sanding creates fine particles. Inhaling plastic dust is not good for your respiratory system.
- Solution: Always, always wear a good quality dust mask. An N95-rated respirator is a good minimum standard.
- Solution: Wet sanding is your best friend here. It dramatically reduces the amount of airborne dust by trapping particles in the water.
- Eye Protection: Fine dust and small flecks of plastic can easily get into your eyes and cause irritation or injury.
- Solution: Wear safety glasses or goggles. This is a non-negotiable for me.
- Fumes (from melting): If you generate too much heat and the plastic starts to melt, it can release fumes that may be unpleasant or irritating.
- Solution: Use wet sanding, light pressure, and keep the sandpaper clean to prevent heat buildup. Work in a well-ventilated area.
Material Integrity and Safety
Beyond personal health, you also want to ensure the plastic material itself isn’t compromised:
- Melting or Smearing: This is the most common issue, caused by friction generating too much heat.
- Solution: As mentioned, wet sanding keeps the surface cool. Use light pressure – let the sandpaper do the work. Don’t dwell in one spot for too long, and keep the sandpaper from clogging, as a clogged paper increases friction.
- Stress Fractures or Cracking: Some plastics can be brittle. Applying too much force or sanding unsupported thin areas can lead to cracks.
- Solution: Ensure the plastic piece is adequately supported while you sand. Use gentle, even strokes.
- Know Your Plastic: Different types of plastic behave differently.
- Softer plastics (like polystyrene found in many models, or ABS from 3D prints) sand fairly easily but are also more prone to melting. Wet sanding is highly beneficial.
- Harder plastics (like acrylic/Plexiglas or polycarbonate) might require a bit more effort and are good candidates for sharp silicon carbide abrasives. These can often be polished to a very high, glass-like shine.
If I’m ever unsure how a particular plastic will react, I always test my sanding process on a scrap piece or an inconspicuous area first. This little test can save a lot of headaches.
Conclusion
Successfully sanding plastic hinges on choosing the right sandpaper (wet/dry silicon carbide is king), using a careful grit progression, and employing safe techniques like wet sanding and wearing protective gear. This ensures a smooth, professional finish every time.

You may also be interested in:

What is the difference between zirconium, ceramic, and aluminum oxide abrasives?
Choosing the right abrasive can be confusing. Using the wrong one wastes time, ruins your workpiece, and costs you money. Let’s make the choice simple for you. The main difference

Best Sandpaper for Aluminum: NOVOGRIT's Guide to Flawless Finishes
What is the Best Type of Sandpaper to Use on Aluminum? Do you find yourself frustrated by sandpaper that gums up instantly when you try to smooth aluminum? It is
Best Sandpaper for Paint Removal: Grits, Types, & Tips | NOVOGRIT
What is the Best Sandpaper for Removing Paint? Are you tired of staring at chipped, peeling paint on your furniture, walls, or even your car? It's a common problem, and
Automotive Wet Sanding: Supplies, Liquids & Best Sandpaper
Automotive Wet Sanding Supplies: What Do You Really Need? Wet sanding is a crucial technique in automotive refinishing, used to achieve a flawlessly smooth surface before painting or polishing. Unlike
Best Sandpaper for Paint Removal & Grit Guide
What Is the Best Sandpaper for Removing Paint? Removing old paint can be a tedious job, but using the right sandpaper makes all the difference. It's not just about grit;
Hardwood Floor Sanding: Screen vs. Sandpaper & Best Practices
Sanding Screen vs. Sandpaper for Hardwood Floors: Which is Best? When you're tackling hardwood floor projects, choosing the right abrasive is crucial for achieving a smooth, professional finish. Both sanding
Paper Backing vs. Mesh Sanding Discs: Which Abrasive to Choose?
Paper Back vs. Mesh Sanding Discs: Which One Should You Pick? Choosing the right sanding disc backing can significantly impact your project's efficiency and finish quality. Paper-backed discs are a
Sanding Mesh vs Paper: Which is More Economical and Better?
Is Sanding Mesh More Economical Than Sandpaper? Comparing Abrasive Costs When stocking up on abrasives, cost is always a factor. Paper sandpaper has traditionally been the standard, but newer mesh
Sanding Nets & Screens Use Cases: When to Choose Mesh Abrasives
Sanding Nets and Screens: What Are Their Best Use Cases? When you encounter sanding nets or screens, you might wonder where they fit into your sanding projects. Unlike traditional solid-backed
